How to Partition Hard Disk Without Formatting in Windows 10/8/7?
Why partition is required?
Partitioning a hard disk means to separate a physical hard disk into several independent drive partitions. For better clarification about partition, Here I have mentioned some points, have a look.
- Your data is organized better than the previous. After partitioning a hard disk into several separate logical drive partitions, you can organize your data on every partition much more precisely like 1 for your operating system, others are your personal data.
- You can run different types of operating systems on one computer: If you need that so, must have several separate partitions in your computer, because an operating system needs independent partition which makes your computer system smoothly.
- The most important thing is it will help with reducing the threats of data loss: If you have different partitions for OS and other personal data, if the operating system crashes and needs a reinstallation your personal data will not affect which you store in different partition.
Follow the procedure for Partition of hard disk without formatting via Disk Management
Windows Disk Management allows you to access the partition of a hard disk, this is a built-in tool of Windows. It is also able to shrink volume, extend partition, create partition, format partition. Below is how to shrink a partition and create a partition in Disk Management.
Open Disk Management:
→ Right-click “This PC”, then click” Manage”→” Storage”→” Disk Management” or use Run (Win+R) diskmgmt.msc

→ Select a partition if you want to shrink and choose “Shrink Volume”.
→ It will pop-out a mini window, you can know the total size before shrink, and available unused space you can shrink for a new partition. You can save the default shrink size and directly hit “Shrink”. Or you can specify the size of the eventual partition by inputting it in megabytes in the respective field.
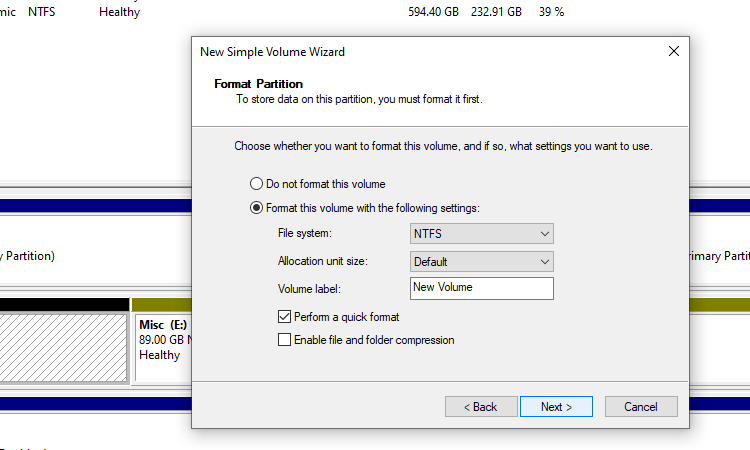
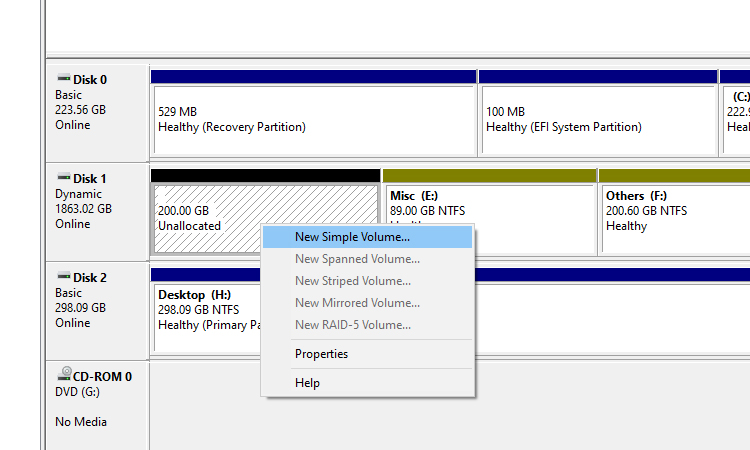
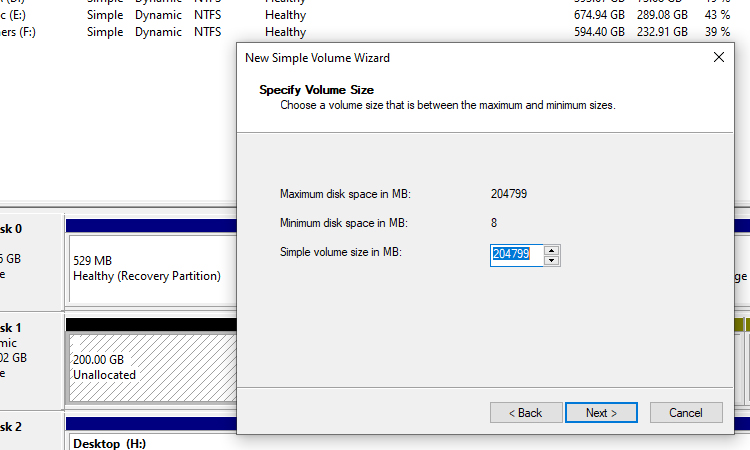
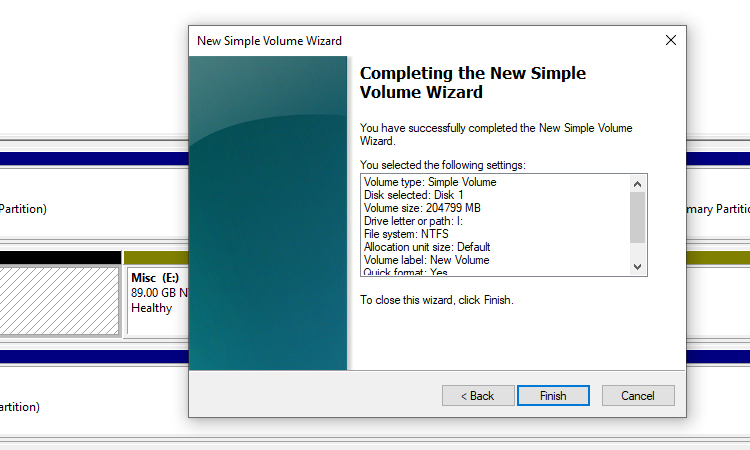
→ After that, you’ll get an “unallocated” space shown next to the original partition. Right-click the “Unallocated” space and select “New Simple Volume” from the resulting menu, then follow the guidance to create a new partition.
Watch Video